As I have had quite a few, complex Plone sites, none of the proposed methods I found on the net would have been useful for me. Some of my sites had a complex subsystem built with Plomino – a kind of CMS in a CMS, while other sites had a forum or a multilingual structure, therefore I had to resort to fire up my beloved web automation tools and build my own scripts to export Plone content in a structured format and import it in my WordPress sites. This article will describe a unique method of exporting a Plone site with web scraping tools and importing it into a WordPress site – a process which could be adapted to practically any kind of CMSes and any type of website migrations.
Why is this method so unique?
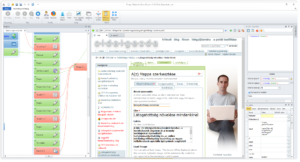
I am imitating a human being during the whole migration process, that is visiting every web page or its editing interface and the site’s management interface to extract the necessary information. Then, in the second step, the content is entered to the new site just like an ordinary web editor would do: by pushing the appropriate buttons, typing in the text and filling in other fields of a page/post edit screen. I am just speeding up the whole process by automating this process with my web automation tools. All in all, instead of querying databases, executing SQL commands, filtering and normalizing data, using import/export add-ons, I am dealing with the ordinary web interfaces of both the new and the old site during the whole migration process. The disadvantage of this process is that it is way slower, but its advantage is that you can do whatever you want.
Complexity of Plone and the export process
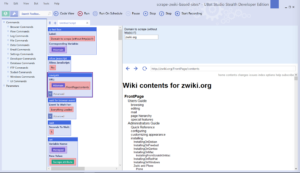
You might have read the logic behind how I had exported the whole content of a Zwiki-based site, but exporting all kind of content from a Plone site resulted in a much more difficult process. The main difference between a simple CMS – like Zwiki – and Plone is that the latter has various content types – both folder-like content types (that is a content which can contain other content elements) and document-like content types. And each of them has a bunch of special fields. Also listing every piece of content was not that easy either, as a Plone site does not have an extensive Table of Contents-like page where every content item is listed — unlike the wiki-based sites.
Step #1: Scraping the old Plone site
a.) getting a list of every content item
First I thought that I would create a script which could scrape every published content from the site without having an administrator access. In that case what my script should have done is to go to the advanced search form, check all available content types and run a search without a search keyword, then go through the result pages by keeping on pressing the next buttons. But I had to realize that there is a setting for each content type which controls whether that content type is searchable or not. Therefore, so as to get a full list of every content item, you should go to the settings page first and make every necessary content item searchable. Then I found out that the portal_catalog must have some bugs because I realized during the process that the advanced search was omitting a couple of content items – and I still could not figure out why.
Finally, I decided to get the list of every content item’s URL, therefore my script first visits the Zope Management Interface, creates a Python script with the following content:
for i in context.portal_catalog.searchResults(Language=''): print i.getURL()
return printed
Then it runs the above script and saves the output of the whole list of URLs in a text file.
b.) getting all the attributes
First I thought that it would be enough to open the edit page of every content item ( {-Variable.url-}/edit ), because every attribute could be extracted from there, but it turned out that for instance the Last Modified date is not listed there, or at least I could not find it, so first I had to open up the ZMI at the {-Variable.url-}/manage_metadata screen to figure out this information. Also, the workflow status was easier to get from the {-Variable.url-}/manage_workflowsTab page.
But then the script opens the {-Variable.url-}/edit page and scrapes basically every input, textarea and select fields except the hidden ones, plus it gets the list of parents from the breadcrumb menu and computes the hierarchy level.
In the next step, it opens the folder content page of its parent ( {-Variable.url-}/../@@folder_contents?show_all=true ) to figure out the position of that content item in its folder, so that later the menu order could be set.
It also downloads images stored as leadImages for news items and similar content types, plus the image itself for the image content type into a similar folder structure to the site’s original folders.
Finally, it adds a new line to the .csv file containing all the common attributes plus the ones who are specific to certain content types. Because of these latter field categories, I always save in the following format: {field name}::{field value} pairs separated by tab characters.
Step #2: Uploading content to the new site
a.) working with the scraped data
Once every content item is scraped with the first script, it’s time to fire the second one. It will process the log file produced by the scraper script. As the first column contains the hierarchy level and the position in the folder, the whole list of items can be sorted so that the script will start uploading the items located in the site root, and continue with the contained items. There is also a check in the script so if a parent item is not found, then it will be skipped and logged – so that you can identify those content items which were not listed somehow (don’t ask me why) in the very first step by querying the Plone database.
b.) decide what to do with different content types
For some content types, like the Document and News Item, it is quite obvious what to do: you can pair the Title, Description/Excerpt and Body text. With some ”folderish” content types like the Folder and Ploneboard, the process can be quite similar.
I decided that I would not create a separate Page or Post for Images. Where they are embedded in documents, I will just upload them to WordPress’ Media Library and insert them as you would normally do with WordPress. But where images were just listed with a thumbnail-based folder view, there I would manually add a WordPress Gallery item to the parent page.
I had a couple of Link items, there I also opted for not creating a separate page/post for them, but rather listing these link items on their parent page, that is only adding a header, link and a description to the Body text of parent pages. I also did something similar with the PloneBoard forum conversations: while these were separate content items in Plone, I just concatenated them to one page in WordPress.
Apart from these modifications, I decided to skip the Topic and Collage items, on one hand, both serve for listing content on one page, and on the other hand they basically mean quite a difficult setup to reproduce: perhaps you can create something similar with the AutoNav plugin, but it is far from obvious, and therefore the better if you really do it manually – if you need to do it at all.
I decided to use Pages for every kind of content, even for the News Item content types used in the Blog section of the old Plone site. I opted for this because pages can have parents and menu (folder) order, similarly to Plone’s structure, but of course, based on the logic of your old site, they could be translated as Posts as well.
c.) Logging what has been uploaded
Once the post/page has been created, it is important to get its ID and log it along with the attributes of the original content. Later on, you can use this information if you want to replace internal links, and it is also important in case something goes wrong. Then you can remove all the uploaded content by their WordPress IDs, and restart the process.
d.) Debugging and error handling
One of the peculiar problems with this ”imitating a manual data extraction / manual data entry” is rooted in the fact that the process takes quite a lot of time. I guess every web page fails to load quite frequently, you just would not notice it as you are usually not downloading hundreds of pages from a server. But in our case, if a page is not loaded, then we can miss a certain piece of content – and believe me, this happens quite often. Therefore every script has to be written with this in mind.
The first, scraper script, for instance, can be restarted when an error occurs, but most importantly it won’t start the whole process from the start, just continue the process where it stopped, finding out the next thing to do by analysing the previously written log files.
But when you start uploading the stuff you want to migrate, errors might occur even more frequently. On one hand, you will be surprised how many times your website will fail to respond, fail to save your content. It’s because normally you never invoke that many web pages or you never try to save so many new pages to see your site dropping your request or failing to respond. On the other hand, when you start to create the content at the new site, only then you will see if something went wrong by scraping the content, or then you will figure out if you have forgotten to scrape a necessary information, etc. For all these reasons, the best thing is to run the upload process in debug mode – so you can effectively see which step is happening right now, and if a page is not loaded for some reason, you can go to the site and check whether the page has been uploaded, just the confirmation was not displayed, or you should restart the upload process of that item.
In addition to that, I had to create a short script which was used in case something went entirely wrong: it would just delete every previously uploaded page (sometimes when there are already other content items on the new page, it is not straightforward to find out which content should be deleted).
Step #3: postprocessing content
a.) updating internal links and image references
There are certain steps you can accomplish only when every content item is already uploaded to the new site: for instance replacing the URLs of old internal links to the new WordPress ID-based links (which is better to use than the permalinks, just because if you, later on, fancy to restructure the migrated site, you will not break any internal link).
Therefore the post-processing script will open every uploaded content item for editing, gather all the URLs in href (and src) attributes, and replace them with the {-Variable.domainprefix-}{-Variable.domain-}/?p={-Variable.postid-} URLs. Things become tricky if originally relative URLs have been used – even more tricky when you consider Zope’s interesting concept called inheritance, so it’s better to translate relative URLs to absolute URLs before you attempt to find the WordPress ID belonging to the referenced content item in the log of the uploaded content.
When it is about replacing the URL of an embedded image (that is changing the reference from the old site to the new one), it is advisable to open the media item’s edit page: {-Variable.domain-}/wp-admin/post.php?post={-Variable.postid-}&action=edit and figure out the image’s file name as it is uploaded.
b.) handling private content items
There is also one more thing to do if you happen to have some content on the old site hidden from the public. Unfortunately, there is a WordPress bug, which has not been fixed during the last eight years: https://core.trac.wordpress.org/ticket/8592 . That prevents me from setting private status right when I upload the content in the previous step. The problem is rooted in the fact that if a parent page’s visibility is set to private, it will not show up in the dropdown list of parent pages on the edit screen either when you open one of the private page’s siblings, or if you plan to create a new sibling page. Therefore editing a page with a parent page having a private status will change the page’s parent to root – and similarly, your recently uploaded page will be created in the site’s root.
In theory, you could install a plugin called Inclusive Parents, but in practice, your site will throw frequent errors when you resort to this kind of ”hacking a bug with a plugin” solution.
Summary
Translating the logic and the structure of a Plone website to a WordPress-based site is not that straightforward. Even if you don’t have to deal with specific content types created by plugins such as Plomino of Ploneboard, you might want upload Links, Folders, News Items in a specific format other than a WordPress Post item. Also, Images are handled in a very different way in both content management systems, causing a couple of headaches too. This might be one big reason why there are no simple export/import add-ons between these two CMSes. Luckily enough with the web automation approach using software packages like Zennoposter (or Ubot Studio), you can build your own Plone to WordPress migration process. Should you need my scripts as a basis for that, don’t hesitate to drop me a line!


